Showing posts with label Maybelline. Show all posts
Wednesday, 30 July 2014
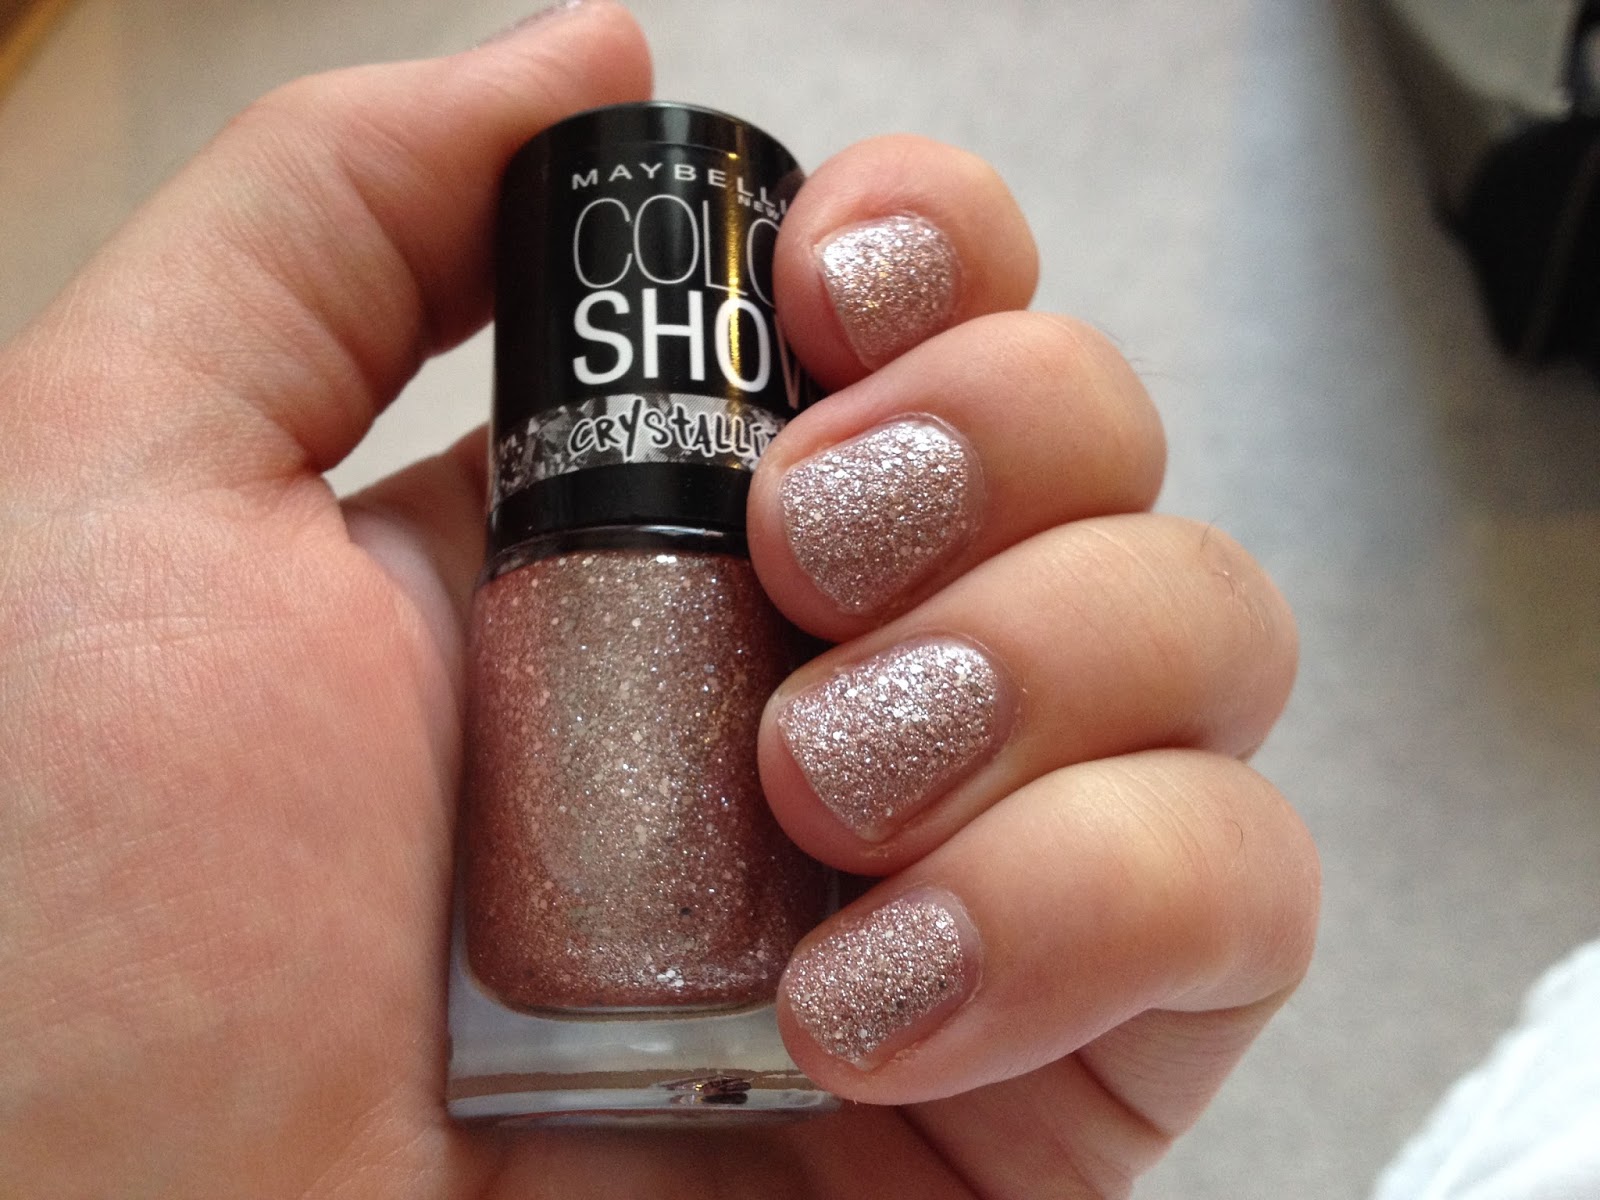
Maybelline Color Show Crystallize Nail Polish: Rose Chic
I don't normally go in for textured nail polishes. I like them to look smooth and glossy. But my colleague at work came in one wearing one of these Maybelline Color Show Crystallize nail polishes and it caught my eye.
The Crystallize polishes come in 6 colours Light Up (silver), Rose Chic (nude), Silver Touch (lilac), Green Depth (green), Red Excess (deep red that looks bronze on the nails) and Nearly Black (black with pink & blue glitter). I chose the shade Rose Chic which is a pretty nude with rose-gold glitter.
Sunday, 9 February 2014
To the Test: Maybelline Baby Skin vs Benefit's The Porefessional
Pores, pores, PORES! It is all I see when I look in the mirror nowadays. For years I have not given them a thought but now there are two much-hyped products which are drawing my attention to them. Does it really even matter if they are visible? I was certainly keen on the claims of smoother even looking skin so I had to give them a go.
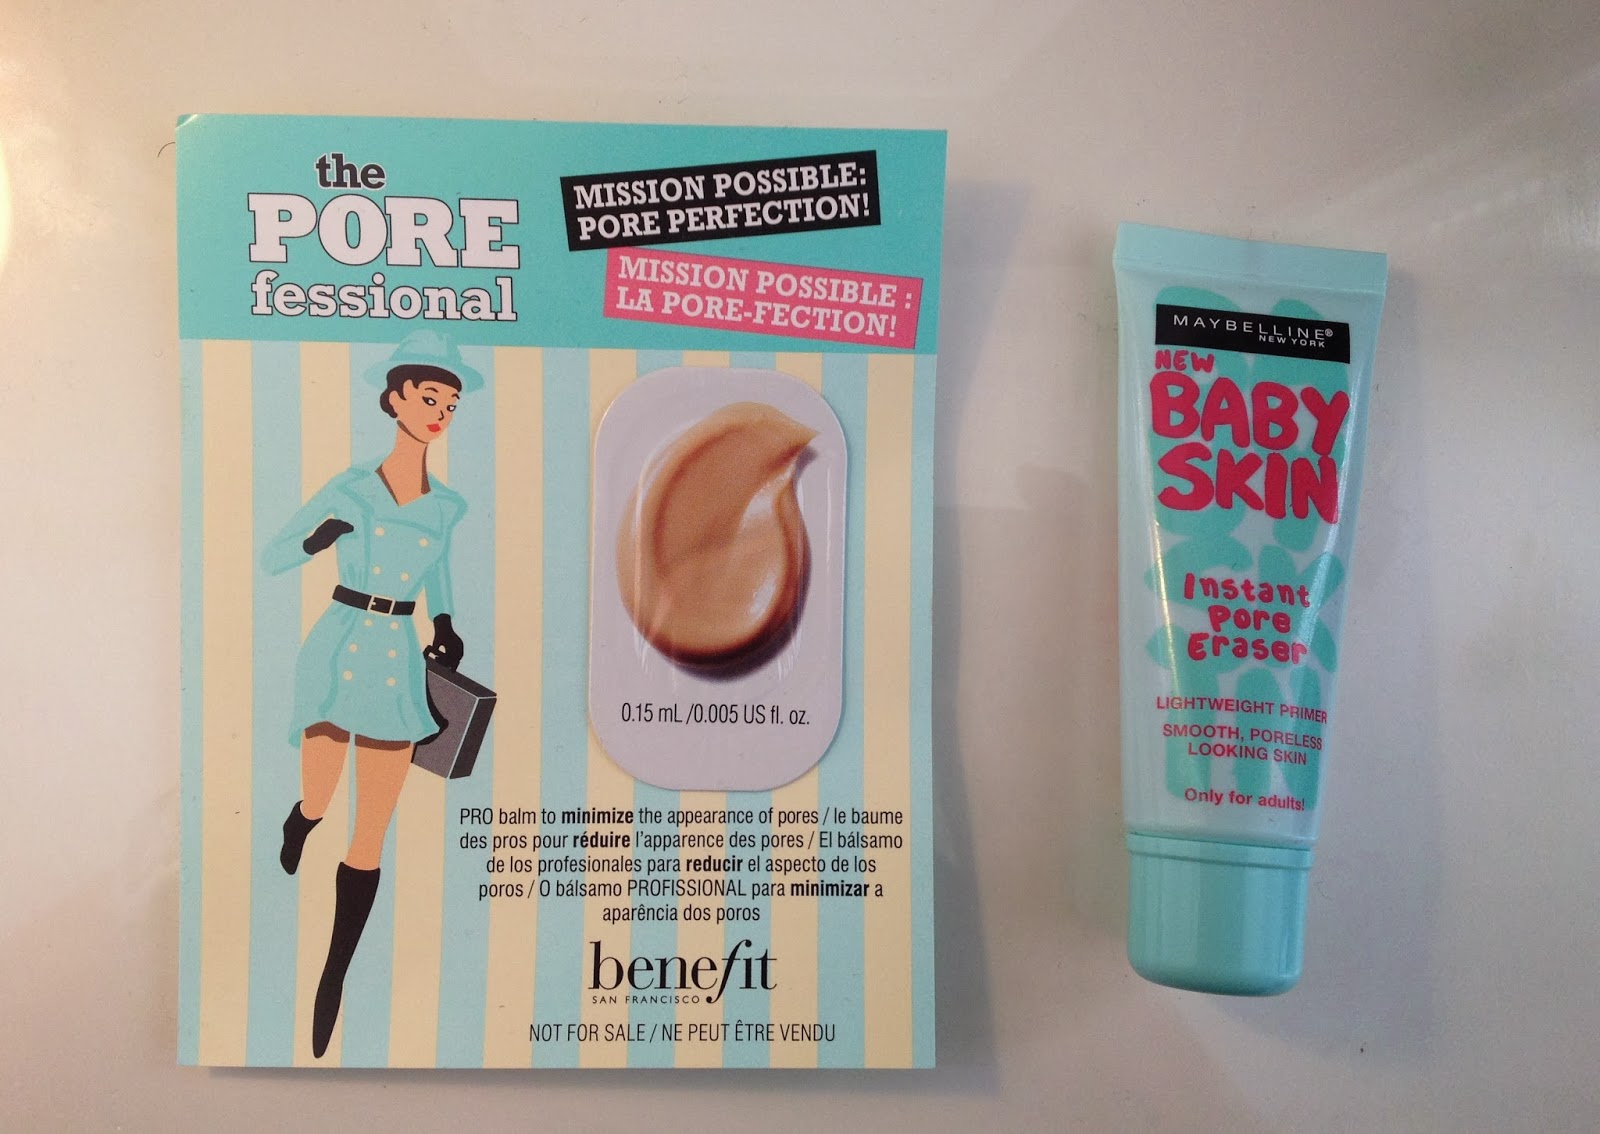
I bought Maybelline Baby Skin Instant Pore Eraser for £7.99 for 22ml from Boots (HERE). I received a sample of Benefit's The Porefessional as part of a recent Twitter promotion Benefit were running. It has similar claims to Maybelline's Baby Skin so my inner scientist thought it was a good idea to try them out together... *Warning: Contains extreme pore photographs and bad skin moments... (well don't say you weren't warned)*
To keep things on an even playing field I applied Maybelline Baby Skin to one half of my face and Benefit The Porefessional to the other. I then applied my Bourjois Healthy Mix Foundation as usual, all over my face using my Real Techniques Expert Face Brush (review HERE).
![]() |
| Top: Maybelline Baby Skin Bottom: Benefit The Porefessional |
First impressions of the two products were that they were quite different. Maybelline Baby Skin is a clear silicone type gel which acts as a light weight primer. It applies nicely and doesn't feel heavy on the skin. Benefit's The Porefessional is a tinted product which feels more like a cream than a gel, it blends in well and the finish becomes matte in a cream-powder way (but it doesn't feel drying on the skin). It felt quite silky to the touch. Neither product has any fragrance or shimmer.
Once blended the matte nature of Benefit's The Porefessional becomes evident. Maybelline Baby Skin is not shiny but to the touch it has a moisturising gel feel to it rather than the powder finish feel of Porefessional. Once blended the tint of The Porefessional isn't really apparent, although I did feel that it disguised some pale freckles that I had.
Under foundation, I felt that the half of my face where I'd used The Porefessional was very matte - it made me look more made-up and my make up look heavier. To be honest I wasn't really comfortable with that. The half of my face that had Maybelline Baby Skin looked fine and still had a slight gel feel to the touch.
After a couple of hours I went to examine my skin closely in the mirror. I noticed that the foundation on the Porefessional side of my face (on the left in the photo below), was now clinging to dry patches. It looked slightly cakey too. In the name of science here is a dreadful photo of my skin and the dry patch in question. See what I mean? Yep you can see that the cakey-ness.
![]() |
| Foundation clings to dry skin on the left of my face - where I'd used Benefit's The Porefessional |
By the evening I have to say I really couldn't see any difference between each side of my face. My foundation had faded on both sides. I would say that my skin still felt more gel-like on the Maybelline Baby Skin side, although it was in an oily kind of way.
You may have noticed by now that the one thing I really haven't mentioned is PORES! I think that when you stare at your pores in the mirror it becomes quite difficult to ascertain how they looked before you applied the product. Luckily I took some hideous close up horror pictures of my pores before and after. So here they are: The money shots!
![]() | ||
| On the left half: Benefit The Porefessional On the right half: Maybelline Baby Skin. Before pore product, after pore product & after product with foundation also applied |
When I look at these photos next to each other I can see an improvement after I applied the products. Both products initially gave a more even look to my skin and pores are less visible! But if I am honest in the flesh I didn't really notice. Looking at the last photo where I have also applied foundation over the top I can start to see a little patchiness in the foundation on the left side where The Porefessional was applied. But there isn't a great deal of difference between the two products immediately after application.
Whilst I like the cream-to-powder silky finish of Porefessional when swatched on my hand, it didn't work on my face. I didn't like the over made-up matte look it gave me and I certainly didn't like how it clung to (previously unnoticed!) dry-skin.
And the winner is.......
For the sake of this experiment my vote goes to Maybelline Baby Skin - not least because it is £7.99 vs £24.50 for Benefit's The Porefessional. I don't think there was anything drastically different between the two performance wise so I don't see why you would pay the extra. Perhaps The Porefessional would work better on oily skin because of the mattifying effect. I do think Maybelline Baby Skin would be a bit too heavy for an oily skin and the silicone type feel would not be a good fit.
However, whilst I think Maybelline Baby Skin is a decent drugstore primer I don't think it compares to my favourite Smashbox Primers. I think I can feel another experiment coming on....
Have you tried any of these? How did they suit your skin type, do you think it helped disguise pores?
Maybelline Baby Skin Instant Pore Eraser is £7.99 for 22ml HERE. Benefit The Porefessional is £24.50 for 22ml HERE. Smashbox Primers are £25 for 30ml HERE.
Monday, 23 December 2013
MAC Monday: Divine Night Fluidline
Welcome to my first ever MAC Monday!
I will come out and say that MAC really is my make-up first love. In honour of this I decided that each Monday I would post about one of my favourite products under the guise of MAC Monday. So plunging straight in, where better to start than my most recent purchase.
MAC released their Divine Night limited edition range back in November. Most of it sold out immediately (including a beautiful plum lipstick called Private Party which I only discovered too late - when its gone, its gone!).
It was whilst I was stalking this elusive lipstick at various MAC counters and shops, that I saw the three Fluidlines that are part of the collection. There were 3 shades:
Deliciously Rich - a glittery bronze
Macroviolet - a deep smoked shimmery purple
Stares and Speculation - a dirty shimmery gold.
MAC Fluidlines are basically gel eyeliners, but you can also use them as a cream eyeshadow or a base for shadow. I hadn't tried one before, but the girl on the counter was wearing Deliciously Rich as a cream eyeshadow all over her lid. It was dramatic and impressive - I instantly bought one.
Fluidlines comes in a glass pot with a screw top lid, which for this sort of product is vital to stop it drying it out (I had an expensive Bobbi Brown gel eyeliner which dried out quite quickly which is so disappointing when you've forked out circa £18!). I did read that if you store them upside down it helps to prevent drying out - it might be worth a try?
I really liked how the cardboard outer packaging has gold lettering as it is part of the limited edition collection. I do tend to keep MAC products in their outer cardboard boxes as I just really like the uniform feel of them and I like to keep them as a collection (did I just admit that out loud?!). I told you it was my first love...
Deliciously Rich is a deep brown with a bronze-gold shimmer. The above swatch in artificial light shows just how beautiful it is when it catches the light.
As soon as I got my little MAC package home I experimented with it as a liner using my MAC 210 Fine Liner Brush. As I suspected the shade was too pale to really define the eyes, although it could add some shimmer over a darker liner. However this did not dampen my ardour - I'd bought it to use as a cream shadow and that it exactly what I did next.
I primed my lids using Urban Decay's Primer Potion in Original and applied the Fluidline over the lid with my finger and then used a matte warm natural brown eyeshadow (MAC - Soft Brown) and a MAC 217 Fluffy Blending Brush to blend it into the crease. I finished it off with some brown liquid liner and a couple of coats of black mascara.
MAC Soft Brown eyeshadow is the perfect transition colour for this look, as it adds some warmth which prevents the darker colour from washing me out. Being fair skinned I often find that a warm colour through the crease helps me carry off cooler tones that otherwise would just make me look tired. The only problem is that this shadow is discontinued in the UK so I had to find one from the states on Ebay. There are of course plenty of alternatives but I haven't found one I like quite as much as MAC's Soft Brown.
The Fluidline is soft and creamy, but it sets really quickly so you have to work fast to avoid patchy eyelids. Using the Soft Brown shadow and the 217 Blending Brush really helped rectify some initial patchiness. Close up in the pictures above it looks like quite a subtle eye but from a distance has more impact as a smokey eye. You could of course layer it up to create a more dramatic look. The colour works really well against blue eyes and finished off with a neutral lip is a combo ready for day or night.
I also have the more budget-friendly Maybelline Color Tattoo 24hr Cream Gel eyeshadows in various shades (they have gone with the American spelling of colour just to confuse us!). MAC's Deliciously Rich is closest to Maybelline's On and On Bronze, although I would argue that MAC's Fluidline gives a denser more intense colour.
I have swatched them both above to compare - and in the flesh the MAC Fluidline was more intense with more sparkle, but the Maybelline is perhaps more photogenic as it holds its own in the photo. Certainly in formula the Maybelline Color Tattoo is much softer and easier to blend but the MAC Fluidline sticks where it is put and is bolder albeit trickier to work with as a cream shadow. There are similarities but because they are at vastly different price points (around £5 for Maybelline and £16.50 for MAC) that may sway you if are thinking about buying one.
Personally I think there is room for both - Maybelline Color Tattoo as an every daytime shade but MAC Fluidline as a bolder night time colour or to layer up as a shimmery liner. The Maybelline can be blended out into a subtle wash of colour but the MAC Fluidline is best as a more intense look.
The other Divine Night Fluidlines have sold out everywhere, but you can still get hold of Deliciously Rich from the MAC website here or from Debenhams here (if you want to use/redeem your Beauty Club points and get free delivery). You can see the full range of Maybelline Color Tattoo 24hr Cream Gel eyeshadows here.
What do you think - have you tried any of these? I would love to see your tutorials and finished looks so do leave your links below.
I will come out and say that MAC really is my make-up first love. In honour of this I decided that each Monday I would post about one of my favourite products under the guise of MAC Monday. So plunging straight in, where better to start than my most recent purchase.
![]() |
| MAC Divine Night Collection |
MAC released their Divine Night limited edition range back in November. Most of it sold out immediately (including a beautiful plum lipstick called Private Party which I only discovered too late - when its gone, its gone!).
It was whilst I was stalking this elusive lipstick at various MAC counters and shops, that I saw the three Fluidlines that are part of the collection. There were 3 shades:
Deliciously Rich - a glittery bronze
Macroviolet - a deep smoked shimmery purple
Stares and Speculation - a dirty shimmery gold.
![]() |
| MAC Fluidline in Deliciously Rich |
MAC Fluidlines are basically gel eyeliners, but you can also use them as a cream eyeshadow or a base for shadow. I hadn't tried one before, but the girl on the counter was wearing Deliciously Rich as a cream eyeshadow all over her lid. It was dramatic and impressive - I instantly bought one.
Fluidlines comes in a glass pot with a screw top lid, which for this sort of product is vital to stop it drying it out (I had an expensive Bobbi Brown gel eyeliner which dried out quite quickly which is so disappointing when you've forked out circa £18!). I did read that if you store them upside down it helps to prevent drying out - it might be worth a try?
I really liked how the cardboard outer packaging has gold lettering as it is part of the limited edition collection. I do tend to keep MAC products in their outer cardboard boxes as I just really like the uniform feel of them and I like to keep them as a collection (did I just admit that out loud?!). I told you it was my first love...
Deliciously Rich is a deep brown with a bronze-gold shimmer. The above swatch in artificial light shows just how beautiful it is when it catches the light.
As soon as I got my little MAC package home I experimented with it as a liner using my MAC 210 Fine Liner Brush. As I suspected the shade was too pale to really define the eyes, although it could add some shimmer over a darker liner. However this did not dampen my ardour - I'd bought it to use as a cream shadow and that it exactly what I did next.
![]() |
| MAC Fluidline in Deliciously Rich as an all over lid colour |
MAC Soft Brown eyeshadow is the perfect transition colour for this look, as it adds some warmth which prevents the darker colour from washing me out. Being fair skinned I often find that a warm colour through the crease helps me carry off cooler tones that otherwise would just make me look tired. The only problem is that this shadow is discontinued in the UK so I had to find one from the states on Ebay. There are of course plenty of alternatives but I haven't found one I like quite as much as MAC's Soft Brown.
The Fluidline is soft and creamy, but it sets really quickly so you have to work fast to avoid patchy eyelids. Using the Soft Brown shadow and the 217 Blending Brush really helped rectify some initial patchiness. Close up in the pictures above it looks like quite a subtle eye but from a distance has more impact as a smokey eye. You could of course layer it up to create a more dramatic look. The colour works really well against blue eyes and finished off with a neutral lip is a combo ready for day or night.
I also have the more budget-friendly Maybelline Color Tattoo 24hr Cream Gel eyeshadows in various shades (they have gone with the American spelling of colour just to confuse us!). MAC's Deliciously Rich is closest to Maybelline's On and On Bronze, although I would argue that MAC's Fluidline gives a denser more intense colour.
|
| MAC Deliciously Rich vs Maybelline On and On Bronze |
I have swatched them both above to compare - and in the flesh the MAC Fluidline was more intense with more sparkle, but the Maybelline is perhaps more photogenic as it holds its own in the photo. Certainly in formula the Maybelline Color Tattoo is much softer and easier to blend but the MAC Fluidline sticks where it is put and is bolder albeit trickier to work with as a cream shadow. There are similarities but because they are at vastly different price points (around £5 for Maybelline and £16.50 for MAC) that may sway you if are thinking about buying one.
Personally I think there is room for both - Maybelline Color Tattoo as an every daytime shade but MAC Fluidline as a bolder night time colour or to layer up as a shimmery liner. The Maybelline can be blended out into a subtle wash of colour but the MAC Fluidline is best as a more intense look.
The other Divine Night Fluidlines have sold out everywhere, but you can still get hold of Deliciously Rich from the MAC website here or from Debenhams here (if you want to use/redeem your Beauty Club points and get free delivery). You can see the full range of Maybelline Color Tattoo 24hr Cream Gel eyeshadows here.
What do you think - have you tried any of these? I would love to see your tutorials and finished looks so do leave your links below.
Subscribe to:
Posts (Atom)