Space NK UK
Showing posts with label Real Techniques. Show all posts

Wednesday, 5 March 2014

The perfect foundation: Chanel Vitalumiere Aqua

Chanel Vitalumiere Aqua Foundation B20


I can't believe I haven't done a post about this foundation earlier! Last night a friend told me she was looking through My Beautopia for recommendations. Aside from this being a huge compliment, I realised that there were a few of my all time favourite beauty products that I was yet to mention. I think I was 'saving' them... Sorry! So here goes:

I stumbled across Chanel's Vitalumiere Aqua Foundation about two and a half years ago whilst watching a Fleur de Force video. I needed a new foundation at the time and was keen to try it. I am so glad I did - because it is simply the best foundation I have found so far! I recommend this to all of my friends (if I can entice them into a cosmetics conversation). I always recommend it to other bloggers and I even bought some for my mum.

As the name suggests, Chanel's Vitalumiere Aqua is a water based foundation. It has a pleasant rose fragrance and a little goes a long way. The product comes in a black box and the foundation bottle is a rectangular plastic bottle (which is the same nude opaque colour regardless of the actual shade that is inside - so don't let that confuse you!). The trick is to make sure you shake the bottle before you squeeze out any product - as it separates in the bottle and you need to make sure it is properly mixed.

Tuesday, 11 February 2014

Rimmel Match Perfection Concealer: A Review


I've been asked a few times recently to recommend a concealer that doesn't crease under the eyes. I have always suffered from dark circles under my eyes and use concealer every day. This is an easy choice for me - I always recommend my current go-to concealer and thought I should post a proper review about it!

I've been using Rimmel's Match Perfection Concealer for 2 and a half years now. It lasts for ages but I'm about to start my third tube. I have so many cosmetics kicking around that I rarely finish anything let alone re-purchase. So this should be a good indication that this concealer does its job!

In the past I have tried all different types of concealer. I of course have YSL's Touche Eclat (HERE) and have tried Clinique's version which is the Airbrush Concealer (HERE). I do like YSL's Touche Eclat but this is better used as a highlighter. I found that the coverage it gives isn't sufficient to hide my dark circles, and ditto to the Clinique version. Aside from the £25 price tag on Touche Eclat I do find it quite annoying that you have no idea how much product is left! One day you get a nasty surprise when the click dispenser stops working and you realise it has all gone - not ideal for a daily use product.

I also tried one of Clinique's tube concealers designed to give greater coverage (I think it was this one, although it was a couple of years ago so forgive me if it was it's predecessor). But I found this very thick to apply and it creased really badly under my eyes.

Having heard bloggers rave about it I also tried Collection 2000's Lasting Perfection Concealer. I was actually really happy with this, especially as it is a bargain at just £4.19 (HERE). My main gripe was that the tube has a dip in wand style applicator, which some people find unhygienic. But for me it meant that too much product collected in the lid and gradually seeped out of the screw-on lid. This meant that my entire make up bag and everything in it became coated and I lost my patience with it!

I don't really suffer with break outs or blemishes, so I use concealer for my dark circles and to disguise any redness around my nose or eyes. What I want from a concealer is to adequately cover up the discolouration, to dispense a small amount of product so I'm not wasting lots of it or risking putting too much on. I also want it to apply smoothly without tugging at the delicate skin under my eyes. Finally I want it to blend easily without losing it's coverage. I have found that Rimmel's Match Perfection manages all of these demands well!

Rimmel Match Perfection Concealer Applicator: Just squeeze to get the product onto the brush!


Rimmel's Match Perfection Concealer comes in a 7ml squeezy tube. The applicator is a soft brush that you apply the product directly to your skin with. You just gently squeeze the tube to push a little product into the brush. This means you can control the amount of product, plus the screw on cap covers up the messy bit and stops any product getting onto anything nearby. I generally blend the concealer easily with my finger, although recently I have been using my new Real Techniques Expert Face Brush to do the job (see my Expert Face Brush review HERE).

Rimmel's Match Perfection Concealer swatch in 030 Classic Beige


Rimmel's Match Perfection Concealer comes in three different shades: Ivory, Classic Beige and Soft Beige. It is designed to adapt to your exact skin tone and can also be used as a highlighter. I have fair skin and I use Classic Beige which has worked perfectly for me all year round. To give you an idea for comparison - I use B20 in Chanel Vitalumiere Aqua Foundation and 52 in Bourjois Healthy Mix Foundation (take a look at findation.com if you want to see how these shades translate into other foundation brands and shades you are familiar with).

I really like this concealer and it has never creased under my eyes - after all who wants to highlight their creases and wrinkles!

Have you tried this concealer? What did you think?

Rimmel's Match Perfection Concealer is £5.99 HERE.

Sunday, 9 February 2014

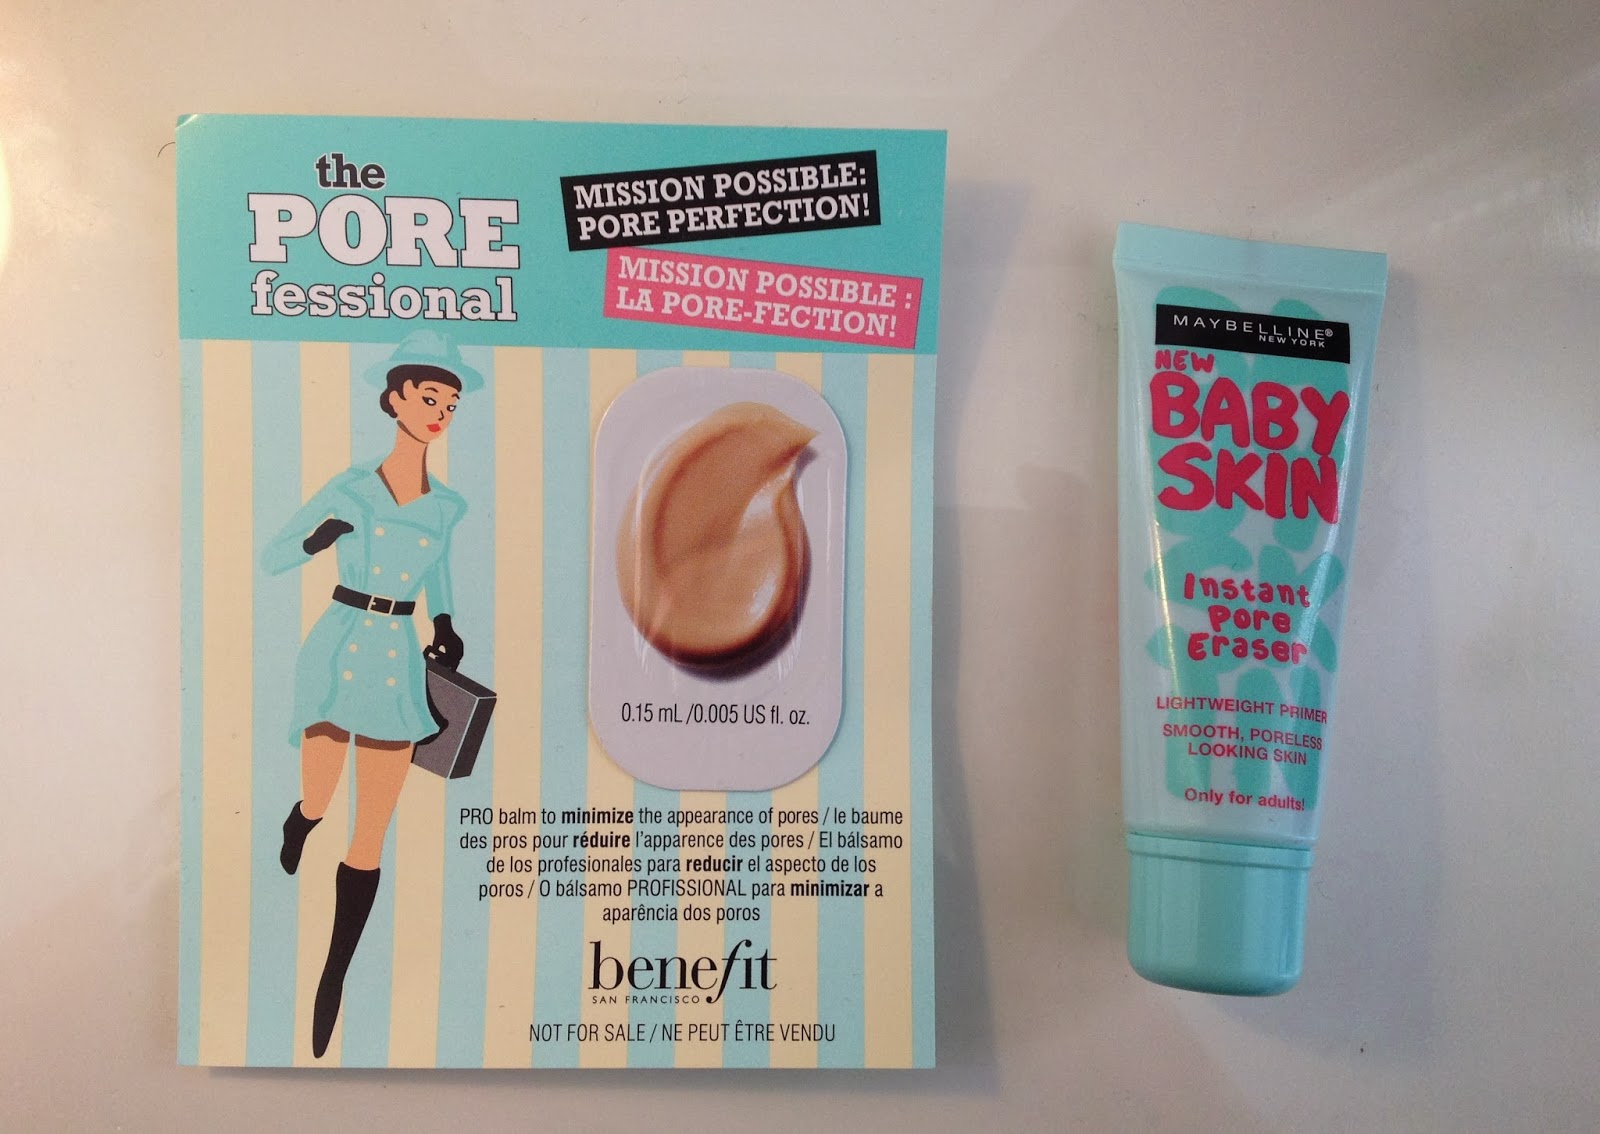
To the Test: Maybelline Baby Skin vs Benefit's The Porefessional


Pores, pores, PORES! It is all I see when I look in the mirror nowadays. For years I have not given them a thought but now there are two much-hyped products which are drawing my attention to them. Does it really even matter if they are visible? I was certainly keen on the claims of smoother even looking skin so I had to give them a go.

I bought Maybelline Baby Skin Instant Pore Eraser for £7.99 for 22ml from Boots (HERE). I received a sample of Benefit's The Porefessional as part of a recent Twitter promotion Benefit were running. It has similar claims to Maybelline's Baby Skin so my inner scientist thought it was a good idea to try them out together... *Warning: Contains extreme pore photographs and bad skin moments... (well don't say you weren't warned)*


To keep things on an even playing field I applied Maybelline Baby Skin to one half of my face and Benefit The Porefessional to the other. I then applied my Bourjois Healthy Mix Foundation as usual, all over my face using my Real Techniques Expert Face Brush (review HERE).

Top: Maybelline Baby Skin    Bottom: Benefit The Porefessional


First impressions of the two products were that they were quite different. Maybelline Baby Skin is a clear silicone type gel which acts as a light weight primer. It applies nicely and doesn't feel heavy on the skin. Benefit's The Porefessional is a tinted product which feels more like a cream than a gel, it blends in well and the finish becomes matte in a cream-powder way (but it doesn't feel drying on the skin). It felt quite silky to the touch. Neither product has any fragrance or shimmer.

Once blended the matte nature of Benefit's The Porefessional becomes evident. Maybelline Baby Skin is not shiny but to the touch it has a moisturising gel feel to it rather than the powder finish feel of Porefessional. Once blended the tint of The Porefessional isn't really apparent, although I did feel that it disguised some pale freckles that I had.

Under foundation, I felt that the half of my face where I'd used The Porefessional was very matte - it made me look more made-up and my make up look heavier. To be honest I wasn't really comfortable with that. The half of my face that had Maybelline Baby Skin looked fine and still had a slight gel feel to the touch.

After a couple of hours I went to examine my skin closely in the mirror. I noticed that the foundation on the Porefessional side of my face (on the left in the photo below), was now clinging to dry patches. It looked slightly cakey too. In the name of science here is a dreadful photo of my skin and the dry patch in question. See what I mean? Yep you can see that the cakey-ness.

Foundation clings to dry skin on the left of my face - where I'd used Benefit's The Porefessional


By the evening I have to say I really couldn't see any difference between each side of my face. My foundation had faded on both sides. I would say that my skin still felt more gel-like on the Maybelline Baby Skin side, although it was in an oily kind of way.

You may have noticed by now that the one thing I really haven't mentioned is PORES! I think that when you stare at your pores in the mirror it becomes quite difficult to ascertain how they looked before you applied the product. Luckily I took some hideous close up horror pictures of my pores before and after. So here they are: The money shots!

On the left half: Benefit The Porefessional   On the right half: Maybelline Baby Skin. Before pore product, after pore product & after product with foundation also applied


When I look at these photos next to each other I can see an improvement after I applied the products. Both products initially gave a more even look to my skin and pores are less visible! But if I am honest in the flesh I didn't really notice. Looking at the last photo where I have also applied foundation over the top I can start to see a little patchiness in the foundation on the left side where The Porefessional was applied. But there isn't a great deal of difference between the two products immediately after application.

Whilst I like the cream-to-powder silky finish of Porefessional when swatched on my hand, it didn't work on my face. I didn't like the over made-up matte look it gave me and I certainly didn't like how it clung to (previously unnoticed!) dry-skin.

And the winner is.......

For the sake of this experiment my vote goes to Maybelline Baby Skin - not least because it is £7.99 vs £24.50 for Benefit's The Porefessional. I don't think there was anything drastically different between the two performance wise so I don't see why you would pay the extra. Perhaps The Porefessional would work better on oily skin because of the mattifying effect. I do think Maybelline Baby Skin would be a bit too heavy for an oily skin and the silicone type feel would not be a good fit.

However, whilst I think Maybelline Baby Skin is a decent drugstore primer I don't think it compares to my favourite Smashbox Primers. I think I can feel another experiment coming on....

Have you tried any of these? How did they suit your skin type, do you think it helped disguise pores?

Maybelline Baby Skin Instant Pore Eraser is £7.99 for 22ml HERE. Benefit The Porefessional is £24.50 for 22ml HERE. Smashbox Primers are £25 for 30ml HERE.

Thursday, 23 January 2014

Real Techniques Expert Face Brush: A Review

 
Real Techniques Expert Face Brush


I have heard a lot about the Real Techniques brushes from bloggers. I held back as cynically I wasn't sure whether people raved about them just because they were created by beauty blogger royalty Sam and Nic Chapman over at Pixiwoo (see more about them HERE). As fabulous as they both are, I wanted to make sure I was getting a brush that did what I needed it to.

I already have a set of Borghese Brushes that I have been really happy with, supplemented by a few key MAC brushes. So I wasn't really on the look out to buy more. But one thing that I hadn't got was a decent brush to apply liquid foundation. To be honest I've always just applied my foundation with my fingers and had been perfectly happy with that!

But continual talk of flawless skin and an airbrushed appearance drew me in. A couple of weeks ago during a Sunday night Beauty Bloggers twitter chat (#bbloggers, Sunday 8-9pm) I asked which Real Techniques Brush everyone recommended. By far the winner was the Expert Face Brush. In second place was the Buffing Brush but this is only available as part of the Core Collection Set so I decided to discount this one for now. Besides for applying liquid foundation the Expert Face Brush fit the bill.

Real Techniques Expert Face Brush


I have to say I'm really impressed! The brush feels nice in your hand, it has a wide base so you can store it standing up if you want to. The bristles are synthetic taklon and create a really firm and dense brush. I'd tried a flat foundation brush before but it seemed to just soak up all of the foundation and leave brush marks across my face. But this one doesn't! The brush feels soft on your skin but applies the foundation really easily, evenly and very quickly. It seems to blend at the same time as you apply. I think perhaps I use a bit more foundation in the process but the brush helps to get better coverage and I guess uses more product.

There are tutorials about how to use the brushes on the Real Techniques website (HERE). I use mine in a circular way starting at the centre of each cheek and I was surprised how quickly I could apply my foundation. I also use it blend my concealer under my eyes. Oddly I really enjoy using the brush!! Who would think you could actually enjoy this bit right? I also really like that I don't get foundation all over my hands in the process.

I love this brush, it isn't often that I just really love a new product that I buy - but I do love this one! Price-wise this brush is really good value at £9.99, especially compared to my MAC brushes which are around £17 just for an eyeshadow brush! In fact I was so impressed I have also just bought the Real Techniques Blush Brush - and I'll be sure to let you know how I get on with it.

Have you tried the Expert Face Brush? How does it compare to the Buffing Blush? Dare I ask - are there any other Real Techniques Brushes missing from my life (come on enable me...)?

In case you are tempted to try it - I have just found a great deal on it too - the Real Techniques Expert Face Brush is at Amazon for just £6.99 HERE. The regular price is £9.99 at Boots HERE.